You will have noticed that NETGEAR has invested a lot of time and energy in simplifying Audio Video networking over IP in recent years. Developments in hardware and software, especially in the category of the M4300 and M4500 series, have contributed in a greatly simplified installation of IP-Multicast environments. This also resulted in a considerable improvement on efficiency in the usecase of multicast network traffic. In case of multiple switches for an IP-Multicast environment, we as NETGEAR have done innovative work. If you use multiple switches in an IP-Multicast environment, the connection (trunk) between the switches is a very important point of attention. In addition to the required throughput for this trunk, it is not only difficult to configure (multicast routing), but also the IGMP overhead deserves the necessary attention. It is precisely the reasons we have developed the IGMP+™ protocol. Our standard IGMP implementation for VLAN1 together with IGMP+, on the M4300 and 4500 series, makes installing those managed switches a plug & play experience for multicast AVoIP environments. In this blog, the most important backgrounds regarding Multicast will be expalined.
NETGEAR AVoIP focus
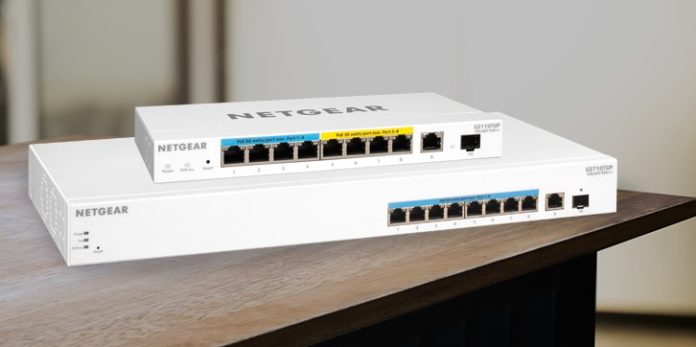
Due to our AVoIP focus, we regularly receive the question whether we also have a simple switch within our range for a small IP Multicast environment. Certainly, in an environment, with only a single switch and a small number of AVoIP devices, where often a higher audio-video compression factor is used at 1Gbps, you can of course use a Smart Pro switch for this purpose. An additional advantage is the range of PoE (15 Watt), PoE + (30W) and PoE ++ (60W) for some of these switches in this category is extensive. This makes it easy to power the AVoIP devices that also have support for Power over Ethernet. If you are going to use multiple switches and / or AVoIP devices with lower latency and less compression, our advice is to use our Managed AVoIP switches such as the M4300 and M4500 series. After all, the robust design of this NETGEAR switch series together with the advantages mentioned at the beginning of this blog, speak for themselves. As mentioned in the introduction, the M4300 and M5400 series are plug & play, but for our Smart Pro switches, there is some configuration involved. To help you out, we will discuss some background information and a step-by-step explanation of how to create an IGMP Multicast configuration on a NETGEAR Smart Pro switch.
If you are interested in a review in which you can see how IGMP on a NETGEAR Smart Pro switch works, watch this video in which Jeroen Caeyers of Wavepart shows how the settings from this blog have been applied and demonstrates what the consequences in case of misconfiguration.
Characteristics IP Multicast
An AVoIP encoder (transmitter) that would like to transmit the same AV signal to multiple receivers would naturally send a separate AV signal for each AVoIP decoder (receiver). As you understand, this will quickly lead to saturation of the network in practice, due to the large amount of network traffic associated with this type of application. To avoid this problem, an AVoIP encoder will send a special type of broadcast called a multicast stream. This multicast stream can be received by many devices simultaneously and this makes an IP network used much more efficient.
However, multicast streams have the disadvantage that when this traffic ends up on a network switch, it will forward this traffic to each port for this switch. This regardless of whether the AV stream is relevant to the connected device on the relevant switch port. This information will cost computing power and perhaps unnecessary bandwidth of the receiving device, despite the fact that it may or may not have requested the AV stream. For this, IGMP Snooping can be implemented to prevent a device from receiving a multicast signal that it has not requested. IGMP snooping allows a switch to learn which of its ports are connected to the intended receivers for an AVoIP multicast stream and then block traffic from those ports where this traffic is not wanted. In summary; by selectively forwarding multicast traffic, the load on each network connection is greatly reduced. When using multicast AVoIP streams, it is advised to configure multicast traffic correctly.
What are the four essential multicast related settings that we have to make:
- IGMP Snooping
- IGMP Querier
- IGMP Fast Leave
- Drop Unregistered Multicast Flooding
On the last point, we can declare that NETGEAR Smart Pro and Managed switch simply are default configured for “Drop Unregistered Multicast Flooding”. This is the default behavior of these kind of NETGEAR switches and thereforet. The rest of the installation can be done with the next steps:
1. Logon into the switch’s management console
The switch can be configured via the web interface. By default, the switch requests a DHCP IP address. If there is no DHCP server on the network, it will assign an IP address 192.168.0.239 itself. NETGEAR’s Smart Control Center application can be used to locate the switch on a network regardless of its IP address. The application can be downloaded from the NETGEAR website.
136/5000
Entering the switch’s IP address in a web browser opens the management console. The first page is the password prompt.

The default password is “password” (entered without quotes). Enter it and press the LOGIN button. The first screen the switch displays the System Information.
Figure 1 – NETGEAR Smart Pro System Information
2. Create a separate AVoIP VLAN
In this example we are creating a separate VLAN for Audio-Video over IP. It is of course also possible to use VLAN 1 for this purpose. Separate VLANs ensure that different types of network traffic to be separated is that interactions are reduced.
The first step is to configure a separate VLAN on the switch for your AVoIP devices. Via this link my colleague explains how you can configurea VLAN on a NETGEAR Smart switch. In this example we give the AVoIP VLAN, number 11.
3. Enable IGMP snooping on the switch
First select the Switching tab and then select the Multicast item from the menu bar. Select IGMP Snooping from the Multicast menu on the left, which will open the IGMP Snooping configuration page.
Select Enable as shown in the image below
Figure 2 – Enabling IGMP Snooping on the switch
Click the Apply button in the top right corner of the screen to save the new configuration
4. Enable IGMP snooping for the AVoIP VLAN
Select IGMP Snooping VLAN Configuration from the IGMP Snooping menu on the left. In the VLAN ID field, select the ID of your AVoIP VLAN (VLAN 11, in this example) and select Enable in the Admin Mode field. Configure the remaining fields using the values in the image below.
Figure 3 – Configuratie IGMP Snooping for the AVoIP VLAN
Note: In this example we will set the FAST Leave Mode to Enable, this option is important if you want the images on the screens to switch smoothly. On a single switch installation, this setting can be turned on without compromise. If multiple switches for AVoIP are used within the environment, you cannot simply do this setting. FAST leave mode must not be active on the trunk ports of the switch!
Query mode can also be set to Enable here.
Click the Apply button in the top right corner of the screen and the page should look like this:
Figure 4 – IGMP Snooping configured on the AVoIP VLAN
5. Further IGMP Snooping settings on the switch
In this part of the configuration, we are going to make the rest IGMP settings for the switch. Of course we also need IGMP Querier within the AVoIP vlan, this Querier ensures that the IGMP database is maintained.
First select the Switching tab and then select Multicast from the menu bar. Select IGMP Snooping Querier from the Multicast menu on the left, which opens the Querier configuration page.
Select Enable the Querier Admin Mode function and then click the APPLY button in the top right corner of the screen.
Figure 5 – Enable Querier Admin Mode
Then select Querier VLAN Configuration. Enter the number of the AVoIP VLAN, set Querier Election Participate Mode to Enable, then enter an IP address to be used for IGMP Querier communication for this VLAN. This must be a unique IP address on the VLAN.
Figure 6– Configure Querier on AVoIP VLAN
Click on the APPLY in the top right corner of the screen.
IGMP snooping is now configured on the switch’s AVoIP VLAN.
6. Checking status of IGMP Snooping Querier
After these settings, the Querier VLAN Status switch can be checked, for this you select the menu option Querier VLAN Status in the Multicast menu
The status of the switch should look like this, especially note that the switch has Querier status:
Figure 7 – Querier status
7. If necessary, enable IGMP jumbo frames on the switch
Final point of attention is that for some encoders it is necessary to adjust the ethernet frame size. In jargon, Ethernet frames larger than usually are called Jumbo frames. For these Jumbo Frame settings, always consult the manual of the encoder used for the solution. Below we explain how to set Jumbo Frames.
Select the Switching tab and then enter the frame size in the Frame size field.
Figure 8– Setting of jumbo frame values
Click Apply to save the settings.
Conclusion
Using NETGEAR Smart Pro switches for small-scale 1Gbps Ethernet-based AV Multicast solutions consisting of a few decoders and one switch is certainly an affordable option. In this case, this category of switches can be linked, parallel and isolated from the existing ICT network. In most cases, this switch will be configured for access to the management of this environment and will be connected to an existing switch via a separate VLAN. In this way, AV traffic does not interfere with the data flows of an ICT network and, of course, not reversed. A NETGEAR Smart Pro switch is not configured by default for multicast network traffic and will always need to be configured manually.
If there is a desire for a Plug & Play solution and a reasonable number of de- and encoders, or multiple switches are required, also when a higher bandwidth between the switches is required, it’s recommended to use a NETGEAR Managed Switch from the M4300 and or M4500 series.
When you have questions feel free to contact our NETGEAR ProAV design team or drop us an email
Eric Lindeman
Sr. SE NETGEAR Benelux


